How to Deep Clean Your Kitchen in 7 Simple Steps
A deep-cleaned kitchen can make your whole home feel fresher, but tackling grease, grime, odors, and hard-to-reach spots can feel overwhelming. You’re not alone—many people struggle to keep every surface and appliance spotless. The right products can make the process easier and help your kitchen sparkle with less effort.
To deep clean your kitchen in 7 simple steps, start by clearing and decluttering countertops and workspaces for easy access.
Next, clean appliances inside and out, then scrub and sanitize cabinets and drawers.
Remove grease from walls and backsplashes, and thoroughly disinfect your sink and faucets.
Don’t forget to wash floors, including hard-to-reach spots, and finish by eliminating odors and cleaning ventilation for fresh air.
Keep following these tips to make your kitchen sparkle and feel completely refreshed.
Key Takeaways
- Clear countertops and organize kitchen zones by grouping similar items and using storage solutions for easy access and tidiness.
- Deep clean appliances by unplugging, removing food, scrubbing interiors with baking soda or degreasers, and sanitizing small appliances thoroughly.
- Wash cabinet and drawer interiors with mild detergent, disinfect surfaces, dry completely, and use organizers to maintain order.
- Clean walls, backsplashes, sinks, and faucets using natural degreasers like vinegar-water solutions and baking soda to remove grease and mineral deposits.
- Sweep and mop floors after moving furniture, clean grout with baking soda paste, and maintain ventilation by cleaning filters and airing out the kitchen.
Clear and Declutter Kitchen Countertops and Workspaces
Before you plunge into scrubbing, clear and declutter your kitchen countertops and workspaces. Start by removing everything from the surfaces—dishes, utensils, small appliances, and any miscellaneous items. This step is essential because it gives you a clear view of what you’re working with and makes cleaning more efficient.
Use this opportunity to sort through the clutter and decide what really belongs on the counter. Implement organizational tips like grouping similar items together and designating specific zones for prep, cooking, and cleaning.
Next, invest in smart storage solutions to keep your counters clear in the long run. Consider drawer organizers, wall-mounted racks, and under-cabinet shelves to maximize space.
Use clear containers to store frequently used ingredients, making them accessible yet tidy. By maintaining a clutter-free workspace, you not only make deep cleaning easier but also create a more functional and inviting kitchen environment.
Deep Clean Your Kitchen Appliances Inside and Out

Now it’s time to tackle your kitchen appliances. Start by cleaning the inside of your refrigerator to help keep food fresh. Next, degrease your oven surfaces so they work more efficiently. Finally, sanitize small appliances, such as toasters and coffee makers, to keep your kitchen clean and hygienic.
Cleaning Refrigerator Interior
Cleaning the refrigerator interior is a essential step in maintaining a fresh and hygienic kitchen. First, unplug the fridge and remove all food items to prevent spoilage.
Next, take out the refrigerator shelves and drawers; wash them with warm, soapy water and let them air dry. Pay special attention to the ice maker, wiping it down carefully to avoid mold and odor buildup.
Finally, wipe the interior walls and door seals with a mixture of baking soda and water to remove stains and neutralize smells. Once everything is dry, replace the shelves and food, then plug the fridge back in.
Degreasing Oven Surfaces
How often do you check your oven for greasy buildup? Oven grime and surface residue can accumulate quickly, making degreasing essential.
Start by removing racks and spraying a degreaser or a baking soda paste on interior surfaces. Let it sit to break down the grime, then scrub with a non-abrasive sponge.
Wipe thoroughly with a damp cloth to remove all residue.
Use this table to understand cleaning agents’ effectiveness:
| Cleaning Agent | Best For | Notes |
|---|---|---|
| Baking Soda Paste | Mild Oven Grime | Natural, non-toxic |
| Commercial Degreaser | Heavy Oven Grime | Quick action, strong |
| Vinegar Solution | Surface Residue | Cuts grease, deodorizes |
Regular degreasing keeps your oven efficient and extends its life.
Sanitizing Small Appliances
Although small appliances may not show dirt as clearly as larger ones, they still harbor germs and food residue that can affect your kitchen’s hygiene. To guarantee proper small appliance maintenance and appliance safety, follow these simple steps:
- Unplug the appliance and detach removable parts. Wash these parts with warm soapy water, then rinse and dry thoroughly.
- Use a damp cloth with mild detergent to wipe the exterior and interior surfaces carefully, avoiding water near electrical components.
- Sanitize by wiping surfaces with a solution of equal parts water and white vinegar, then dry completely before reassembling.
Regularly cleaning and sanitizing your small appliances extends their lifespan and keeps your kitchen safe and healthy.
Scrub and Sanitize Kitchen Cabinets and Drawers
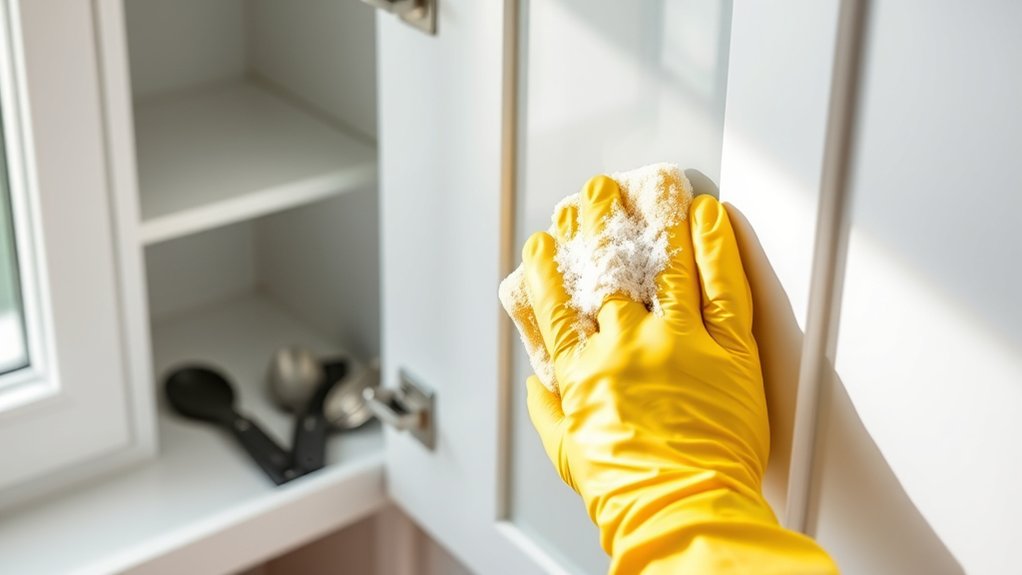
Since your kitchen cabinets and drawers get touched frequently, they can quickly accumulate grease, dirt, and bacteria. Start by emptying them completely to focus on thorough cleaning and improving cabinet organization.
Use a mild detergent mixed with warm water to scrub surfaces, paying close attention to handles and edges. For drawer maintenance, wipe down interiors and check for crumbs or spills that attract pests.
After scrubbing, sterilize cabinets and drawers with a disinfectant spray or wipes to kill lingering germs. Allow everything to dry fully before replacing items to prevent moisture buildup.
Here’s a quick guide to effective cabinet and drawer cleaning:
| Task | Cleaning Agent | Tips |
|---|---|---|
| Exterior Scrub | Mild detergent | Focus on handles and corners |
| Interior Wipe | Warm water | Remove crumbs & spills |
| Sanitize | Disinfectant spray | Let dry completely |
| Organize & Replace | N/A | Use drawer organizers |
This approach ensures your kitchen stays clean and well-organized.
Clean Grease and Grime From Walls and Backsplashes
Use an effective degreaser to cut through stubborn grease without damaging your walls or backsplash. Clean gently and safely to protect the surface while removing grime. To keep your kitchen looking fresh, take steps to prevent grease buildup in the future.
Effective Degreasing Solutions
How do you tackle stubborn grease and grime that cling to your kitchen walls and backsplashes? Using effective degreasing solutions made from natural ingredients can make the job easier and safer for your home. Here’s how you can do it with eco friendly solutions:
- Mix equal parts white vinegar and water in a spray bottle. Vinegar’s acidity breaks down grease without harsh chemicals.
- Add a few drops of lemon essential oil for extra grease-cutting power and a fresh scent.
- Spray the solution on greasy areas, let it sit for 5 minutes, then wipe with a microfiber cloth.
This simple, natural approach cleans thoroughly while protecting your kitchen and the environment.
Safe Cleaning Techniques
Natural degreasing solutions are a great start, but applying the right techniques guarantees you clean your kitchen walls and backsplashes safely and effectively. Always test eco friendly products on a small, hidden area first to avoid damage.
Use a soft cloth or sponge to gently scrub grease and grime without scratching surfaces. Avoid harsh chemicals; prioritize chemical safety by choosing non-toxic cleaners that won’t harm your health or the environment.
Ventilate the area well when cleaning to reduce exposure to fumes. For stubborn spots, apply your cleaner and let it sit briefly before wiping.
Rinse with warm water and dry thoroughly to prevent streaks and residue. Following these safe cleaning techniques protects both your kitchen surfaces and your family’s well-being.
Preventing Future Buildup
Although cleaning removes grease and grime, preventing future buildup saves you time and effort in the long run. To keep your walls and backsplashes spotless, focus on smart kitchen organization and effective storage solutions.
Here’s how you can stay ahead:
- Wipe down walls and backsplashes regularly with a gentle cleaner to prevent grease accumulation.
- Use splash guards or install easy-to-clean backsplash materials like glass or tile for better maintenance.
- Organize your kitchen tools and ingredients with proper storage solutions, reducing clutter and minimizing grease exposure on surfaces.
Clean and Disinfect Your Kitchen Sink and Faucets
Since your kitchen sink and faucets handle food scraps and dirty dishes daily, they can quickly become breeding grounds for bacteria. Start by removing any debris from the kitchen sink, then rinse it with warm water.
Apply a mixture of baking soda and water to scrub the sink’s surface thoroughly, focusing on corners and around the drain.
For faucet cleaning, use a soft cloth soaked in white vinegar to wipe down all surfaces, including handles and spouts, which helps dissolve mineral deposits and grime. Don’t forget to clean the aerator by unscrewing it and soaking it in vinegar for 15 minutes.
After scrubbing, rinse both the sink and faucets with warm water and dry them with a clean cloth to prevent water spots.
Finally, disinfect by spraying a kitchen-safe disinfectant or diluted bleach solution, letting it sit for a few minutes before rinsing. This routine keeps your kitchen sink and faucets hygienic and sparkling clean.
Wash Kitchen Floors Thoroughly, Including Hard-to-Reach Spots
Once your sink and faucets are spotless, turn your attention to the kitchen floors, which often collect crumbs, spills, and dirt in corners and under appliances. To deep clean effectively, follow these steps:
- Clear the floor: Move lightweight appliances and furniture to access hidden areas. Sweep or vacuum thoroughly, paying close attention to corners and under appliances where dust and debris hide.
- Scrub the tile grout: Use a grout cleaner or a baking soda and vinegar paste with a stiff brush to tackle stains and grime in tile grout lines. This restores brightness and prevents mold buildup.
- Mop with care: Use warm, soapy water or a floor cleaner suitable for your floor type. Mop the entire kitchen floor, ensuring you reach under appliances and around baseboards. For hard-to-reach spots, use a long-handled mop or a damp cloth.
Remove Kitchen Odors and Clean Ventilation for Fresh Air
When cooking odors linger and the air feels stale, tackling your kitchen’s ventilation system can make a big difference. Start by cleaning or replacing your range hood filters. They trap grease and improve odor absorption.
Next, wipe down vents and fans to remove dust and grime that reduce airflow. For persistent smells, try placing natural odor absorbers like baking soda or activated charcoal nearby.
Regularly airing out your kitchen by opening windows also helps refresh the space.
Here’s a quick guide to removing kitchen odors and maintaining your ventilation system:
| Task | Benefit |
|---|---|
| Clean/replace filters | Improve odor absorption |
| Wipe vents and fans | Boost air circulation |
| Use baking soda/charcoal | Neutralize persistent odors |
Keeping your ventilation system in top shape ensures fresh air, reduces lingering smells, and creates a more pleasant cooking environment.
Frequently Asked Questions
How Often Should I Deep Clean My Kitchen for Best Results?
You should deep clean your kitchen every 1 to 3 months for best results. This helps maintain kitchen organization and guarantees your appliances stay in top shape through regular appliance maintenance.
If you cook often or have kids, consider deep cleaning closer to every month. Staying consistent prevents buildup and keeps your space hygienic, making daily cleaning easier and your kitchen more enjoyable to use.
What Natural Cleaning Products Are Safe for Kitchen Surfaces?
You can use vinegar, baking soda, and lemon juice as eco friendly alternatives for cleaning your kitchen surfaces. These chemical free solutions are safe and effective for countertops, sinks, and appliances.
Mix vinegar with water for a natural disinfectant, use baking soda to scrub stubborn stains, and lemon juice to cut grease and leave a fresh scent. These options keep your kitchen clean without harsh chemicals.
How Can I Prevent Mold Growth in My Kitchen?
You can prevent mold growth by improving kitchen ventilation—open windows or use exhaust fans while cooking. Mold prevention also means wiping down wet surfaces promptly and fixing leaks quickly.
Keep humidity levels low with a dehumidifier if needed. Clean regularly with natural mold-fighting solutions like vinegar or baking soda.
What Tools Are Essential for Efficient Kitchen Deep Cleaning?
You’ll need a few essential tools for efficient kitchen deep cleaning: microfiber cloths for wiping surfaces, a scrub brush for stubborn grime, and a good-quality degreaser. Don’t forget gloves to protect your hands.
For appliance upkeep, a soft brush or vacuum helps clean vents and coils. Storage organization benefits from clear bins and labels to keep things tidy.
These tools make your deep clean faster and more effective, ensuring a spotless kitchen.
How Do I Safely Clean and Maintain Kitchen Knives?
Think of your kitchen knives as dancers—keeping their moves sharp and safe guarantees they perform well. To safely clean and maintain them, always hand wash with mild soap and dry immediately to prevent rust.
Use a honing rod regularly for knife sharpening to keep blades aligned. Store knives in a block or magnetic strip to protect the blade and avoid accidents.
Conclusion
Now that you’ve tackled these seven steps, your kitchen will sparkle like never before. Remember, “a clean kitchen is a happy kitchen,” and keeping it fresh makes cooking more enjoyable and stress-free.
Regular deep cleaning not only boosts hygiene but also extends the life of your appliances and surfaces. Stick to this kitchen deep-cleaning routine, and enjoy a spotless, welcoming space every time you step in. You’ve got this!